This amazing project decorated my apartment very temporarily. For less than 24 hours, if you want to know how temporarily. It all began when the director of the library where I work asked for help creating a wreath to sell at a holiday auction. I volunteered. (Call me naive.)
After we sat down to discuss specifics (we found inspiration
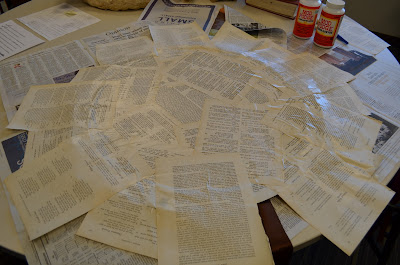
here) she bought a wire wreath form and I hunted for an appropriately-timeworn book. I settled on
English Literature and Its Backgrounds. Full of classic stuff.
I rolled the pages into "torch" shapes. Starting with the ragged edge close to me and the smooth edge away from me, I rolled from the lower left corner toward the upper right corner. The rolls' length varied, but that inconsistency didn't affect the outcome.
It took about 60 rolls to go around the 24" wire frame. The finished wreath needed two layers, so...lots of rolling. Meghan, a fellow library staffer, pitched in so I wasn't going it alone.
We did things in a strange order because I wasn't exactly sure how I would accomplish each step until I got to it. I had a general outline of my process...
...but as I reached moments of truth, like the moment to glue the paper rolls in place, I realized I had neglected to account for certain details, like the fact that there was really nothing to glue the rolls to. Beth, who in her capacity as friend helped me with the door desk I described yesterday, in her capacity as co-worker made a special trip to buy me foam board, from which I cut a big circle that I wired to the frame for a solid central surface. You'll see that in a second.
The photo above shows the back side of the wreath. The foam board circle is wired in. Over it I randomly Mod Podged a bunch of pages to give the back an integrated look. (Originally I planned to cover the front
and back of the wreath with rolls, but that would have been impractical both from a time-constraint perspective and a this-will-probably-hang-against-a-wall perspective. Duh; if the back was covered with rolls they would get crushed. Thanks for pointing that out, Debbie!)
This is also the step where I looped a ribbon around the wire frame, pasting pages right up to the ribbon so when everything was finished it seemed to emerge from the pages. Psst...here you can see how the foam board is secured to the frame: my co-worker Karen punched holes near the edge of the board, then I ran wire through them and through the first loop of the wire frame, and twisted the ends tightly.
Now things get fun. I'd been working mostly by myself on this. My friend & co-worker Erika had offered to help but our schedules hadn't aligned. Finally, when we were planning to be together for a craft night, she had the brilliant idea of working on the wreath, which had to be done by the next day. I thought I was close to being done, but, boy, was I wrong. More on that shortly.
Before my fellow crafters arrived, I placed the wreath front-side-up and got to work. The pages I'd stuck to the back hung over the edges--all part of the plan; don't worry. I snipped all the way around to create little tabs that could fold over the edge without wrinkling.
Here's a look at about how big the tabs were. I only snipped up to the edge of the wire frame.
Then, paintbrush in hand, I went around gluing all those tabs in place with more Mod Podge. It was cold outside but I opened the balcony door anyway for some fresh air. Whew!
About the time that pungent adhesive dried, the ladies began to assemble. Before long it wasn't only Erika helping, but also Meghan...
...and Lindsey, and Jessie. Beth took these photos for me. This process took much longer--and many more adjustments--than I anticipated. I was grateful to have so many people helping me achieve the look I'd been aiming for, despite the fact that my original plan contained a few flaws. Just a few.
We ended up snipping the ends off several paper rolls when we realized their ends couldn't all touch the center without creating wild wonkiness. Lindsey suggested that we make the cross pattern Erika & Meghan are gluing in the first action shot. After that, we filled in the gaps with rolls shortened as needed to maintain the proper angle in relation to the center. Looking back at the inspiration wreath, I see that they didn't try to make all their rolls touch
each other, but spaced them so probably all the ends did touch the
center. Oh, well.
We also built up the middle by stacking four small cardboard circles into a little platform to give the central medallion a resting place. Without the platform, the medallion wouldn't have sat flush across the top of the paper rolls, but would have suffered crunching and crushing before it made contact with the foam board.
A couple hours and averted disasters later:
We topped off the medallion base with what we hoped would be a universally-appealing poem: "The Means to Attain a Happy Life."
What I'm thankful for today:
Friends who save me from my own ambition!
Credit where credit is due:
Susan W. took photos 4 & 5; Beth B. took photos 10, 11, & 12.


2 comments:
I really like how it turned out!
Thanks! At first I insisted I was never doing one of these again, but now that I've parted with the original, I'm sort of changing my mind....
Post a Comment