You've witnessed the atrocity that is this multi-colored canvas.
Well, prepare to see it transformed into something much less disgusting and much more useful. The long-overdue project was my great accomplishment on Christmas day. I started by marking the fabric with a yellow sharpie, my palest, least-likely-to-bleed-through color. I measured enough for a 3" overhang on all sides of my giant canvas.
Next, I cut out that large piece of fabric. I positioned it over the canvas and knelt on one edge to hold it in place.
Then I pulled down the top like a bedsheet, sprayed the canvas beneath with an even coat of spray adhesive, and smoothed the fabric back in place. Thus, in a matter of seconds, half the ugly old was covered in unobtrusive new.
I repeated this step in reverse for the lower half of the fabric. Then I carried the whole thing to the table to finish with hot glue. Starting with a less-daunting short side, I glued down the overhanging fabric a few inches at a time, pulling tight before letting the fabric touch the glue. (I didn't want any wrinkles on the front!)
The corners were a little tricky. I've never been great at corners, whether we're talking about wrapping presents, making the bed, or gluing fabric to a homemade message board. I think these corners turned out passably, though.
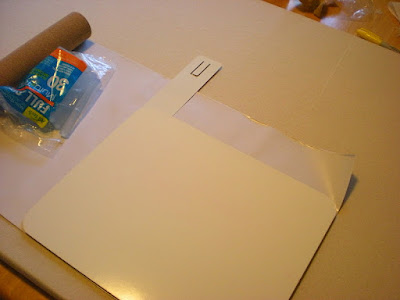
When all the edges were secured, I flipped the board face-up to attach a cork board and a dry erase board. The cork came from a $5.99 roll I bought at Hobby Lobby. It was one long, thin sheet with a fully adhesive back. I cut it to size using the height of the dry erase board as a guide. (The ruler served to extend the top line of the board, which was narrower than the cork.)
Once it was the proper size, I rolled the cork backwards to counteract its tendency to curl back on itself--so annoying! Then I peeled back a couple inches of the plasticky/paper stuff that covered the adhesive. That way the adhesive would stay exposed while I positioned the cork where I wanted it.
When I had it in place, I gradually peeled away more and more of the backing, smoothing the cork from middle to edges as I stuck it down. Going slowly helped me avoid bubbles and crookedness. It was even easier to stick the dry erase board, which came with 3M-style sticky foam pieces. Here's the finished board hanging above my desk.
Now all that remains is to buy or make a 2012 calendar to hang at the top. The whole idea here is to rid my desk surface of insidious little scraps of this and that--library due slips, grocery lists, dates to transfer to the calendar, and so on. What do you do to keep those little notes under control?


No comments:
Post a Comment